
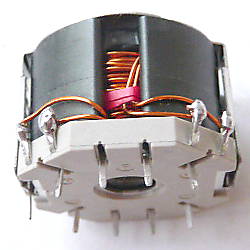
 Often coils have to be custom made for your application. I started making my first coil by simply taking a bobbin and wire and winding the coil by hand (see left). This can be a very boring job. So it was time for a simple winder that is cheap and easy to build. I didn’t want to wind by hand and count the windings in my head any more. So the winder had to have a motor, a rotary encoder and an arduino to do the counting job. This is the reason I started my series of posts: Beginning with the photointerrupter basics, then the schematic details for getting good signals, making a simple rotary encoder for testing and then a quadrature encoder. Also some code examples are added to get it running. The quadrature encoder is necessary for detecting the turning direction. When something goes wrong while winding you can turn some revolutions back, continue winding and still have the correct number of turns.
The parts
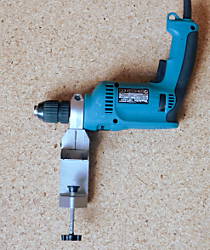 I looked around in my workshop for the components I wanted to use. First of all I took a drill with electronic speed control that is also able to run in both directions. While doing my first tests it turned out that a drill with dual speed range would be better because minimum speed is much lower than with the one I have. A stand for the drill would be good and I found one that can be fixed at a table.
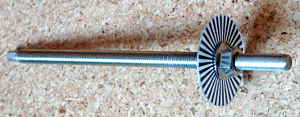
The next part is the spindle that holds both the index disc of the rotary encoder and also the bobbin. I took a long hanger bolt and cut off the part with the wood thread. The long threaded part will hold the bobbin and the short part without thread goes into the chuck of the drill.The diameter of the hanger bolt depends on the size of your bobbins. Two hexagon nuts with serration fix the index disc on the spindle.
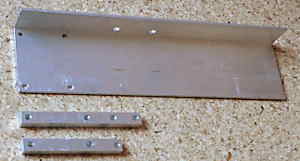
Some aluminum parts hold the components together. These are also parts made from material I found in my workshop. The details of the construction depend on the drill stand and on how you make your encoder.
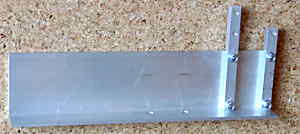
The aluminum parts give you the base for the winding machine. The drill stand will be fixed at the two holes in the bottom.
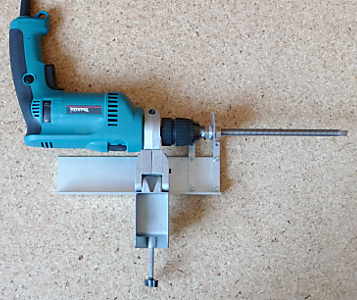
Putting it all together gives you the complete mechanics of the winding machine.

Now add your photointerrupters to get the rotary encoder working, adjust them, connect to your arduino, upload the code and you are done! Fix the bobbin on the spindle using nuts with serration or what is suitable to your bobbin. If the bobbin doesn’t fit perfectly on the spindle take some insulation tape as shown in the picture.
This winding machine doesn’t take a lot of time and money to build and is way more comfortable than winding by hand. If you want you can upgrade it with a foot pedal. Then you will have both hands free for feeding the wire. If you want a much more professional machine you can buy a used lathe and use the support for automatic wire feed. But this is much more work than this simple machine you see here.
Enjoy
heliosoph
I would use the Arduino to do all the controls. Apart from doing the counting as it does now. I would use it to make the drill “soft start”. Basically you would push a button, a LED would blink few times so you can prepare for the start. Then the drill would start, very slowly while you’re on the inside of the coil and go faster until it starts to slow down shortly before the coil is fully wound.
If the wire does not “fold” correctly you could press another button and the drill would slow down, stop, and start to turn slowly backwards until until you press the first button again. Then it stops winding down and starts winding up again. That way you could also use standard counter because the Arduino would know in which direction it was turning.
Thank you for this reply! I thought of something like this as well. This would be the next step in making the machine more comfortable. You described it very well. Then adding a LCD display lets you see the number of turns. Using a foot pedal with a potentiometer would also let you control the speed of the machine but with both hands free. Of course it should automagically slow down and then stop when it goes to the end of the coil. For me realizing something like this depends on the number of coils I need.
Best regards
heliosoph