Tag Archives: arduino

ArduinoISP: reading and writing fuses on ATmega328P

An arduino board like the Uno can be a programmer for a standalone ATmega chip. For the ATmega328P that is used in the Uno there is a tutorial on the arduino homepage. This lets you burn the bootloader into the chip without the need for other hardware. This post shows how to use the same configuration for reading and writing the fuses on the chip. Continue reading

Arduino powered by a capacitor – first tests

atmega_capacitors_pv_1
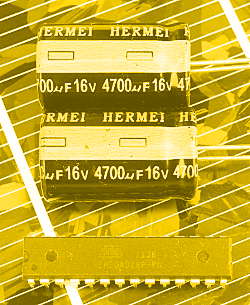
This is the second post about powering an arduino from a capacitor. The basic setup is described in the introduction. It’s an ATmega328P in a standalone setup with use of the internal clock source. The power comes from the two capacitors on the picture. The microcontroller measures it’s own supply voltage repeatedly in intervals and writes data to the onboard EEPROM. After starting the measurement the power supply is plugged out and the ATmega runs off of the capacitors until the voltage is too low.

In this post I will describe how long the setup can run with different power-reducing techniques. Continue reading

Arduino powered by a capacitor – the start

atmega_capacitors_pv
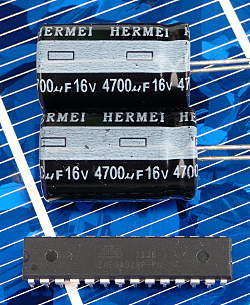
Let’s take a capacitor as the power source for an arduino. But what sense does that make? This is totally nonsense you might say. A capacitor can’t store enough energy to run a microcontroller for a considerable time. Take a rechargeable battery to get it running. You’re right (at first sight).

But let’s have a closer look at this. The idea behind is: How long can a microcontroller like e. g. the ATmega328 run off of a capacitor when power consumption is reduced to the limit? When we get reasonable results we could make a Minimal Solar Arduino with a capacitor to store the energy. This is the idea behind this project: Building a solar powered arduino system with minimal power consumption and a minimum of components. The project is inspired by these great articles: Power saving techniques for microprocessors from Nick Gammon and Operating an Arduino for a Year from Batteries from Alan Mitchell. Thank you both for your work! Continue reading

Solar power for your arduino – building a system

pv-arduino-1
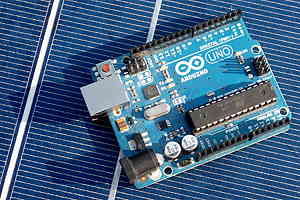
In this post we will talk about some practical topics when it comes to building a real standalone PV system. We know the basic function of the system, about the load, we know the battery basics and selected a battery. We talked about what the PV module does and we looked for a module for our project. We also have a charge regulator. Now we will put this all together and connect the components. Continue reading

Solar power for your arduino – charge regulator

pv-arduino-1Our stand-alone PV system is almost complete now: We have the module the battery and our load. Now it’s time to connect the devices. Therfore we need the charge regulator. All other components are connected to it. The charge regulator has two functions: It limits the charging current to get the battery charged in an optimal way and to prevent overcharge. The second function is to cut off the load when the battery runs empty to prevent a deep discharge. This is all done to extend battery’s life. In this post we will look at how these functions are built in hardware and what are the different concepts of charge regulators. We will also talk about choosing the “right one”. Continue reading

Solar power for your arduino – PV module dimensioning

pv-arduino-1We have already defined the electricity consumption (=the load) and the battery size of our standalone PV system. We also know about the electrical characteristics of a solar panel. Now it’s time to determine the size of our panel. This is what we will do in this post. The key to this is the basic function of the system: The PV module has to bring enough energy to keep the system running. This means that the energy from the module must be at least the electricity consumption plus the system losses. Then the system will work. For a calculation we will take the consumption per day. Continue reading

Solar power for your arduino – PV module basics

pv-arduino-1Now that we talked about the basics of a pv system, load, battery basics and selecting a battery it is time for the PV module that gives the system the energy it needs to work. In this post we will discuss the basics of a PV module: Electrical characteristics and how it behaves when irradiation or temperature change. The second part of this post is about testing conditions for PV modules and what the data of the module mean in real life. Continue reading

Solar power for your arduino – battery characteristics

pv-arduino-1In this post we will start to talk about the component that stores the energy from the PV module until it is used: the battery. We will build our system with a lead-acid battery. This post is about the basic function of the battery in our system and the electrical characteristics that are important to us. The next post will be about the different types of lead-acid batteries and how to choose the right type and size. Continue reading

Solar power for your arduino – load

pv-arduino-1A standalone PV system begins with thinking about the load. So let’s talk about our load: The characteristics of the load determine all the components of the PV system because it must be designed to feed the load so that everything works the way we want it to.

In the first part of this article we will talk about choosing the appropriate system voltage. The second part is about how much electricity is consumed and how to optimize the system in a way that it needs less energy but still is fully functional.
Continue reading